
Build a QR-Code Asset Check-Out App in Power Apps: Know Who Has Every Piece of Equipment
Laptops, tools, scanners, tablets, test equipment and other shared assets are frequently handed between employees without a reliable record of who currently has them.
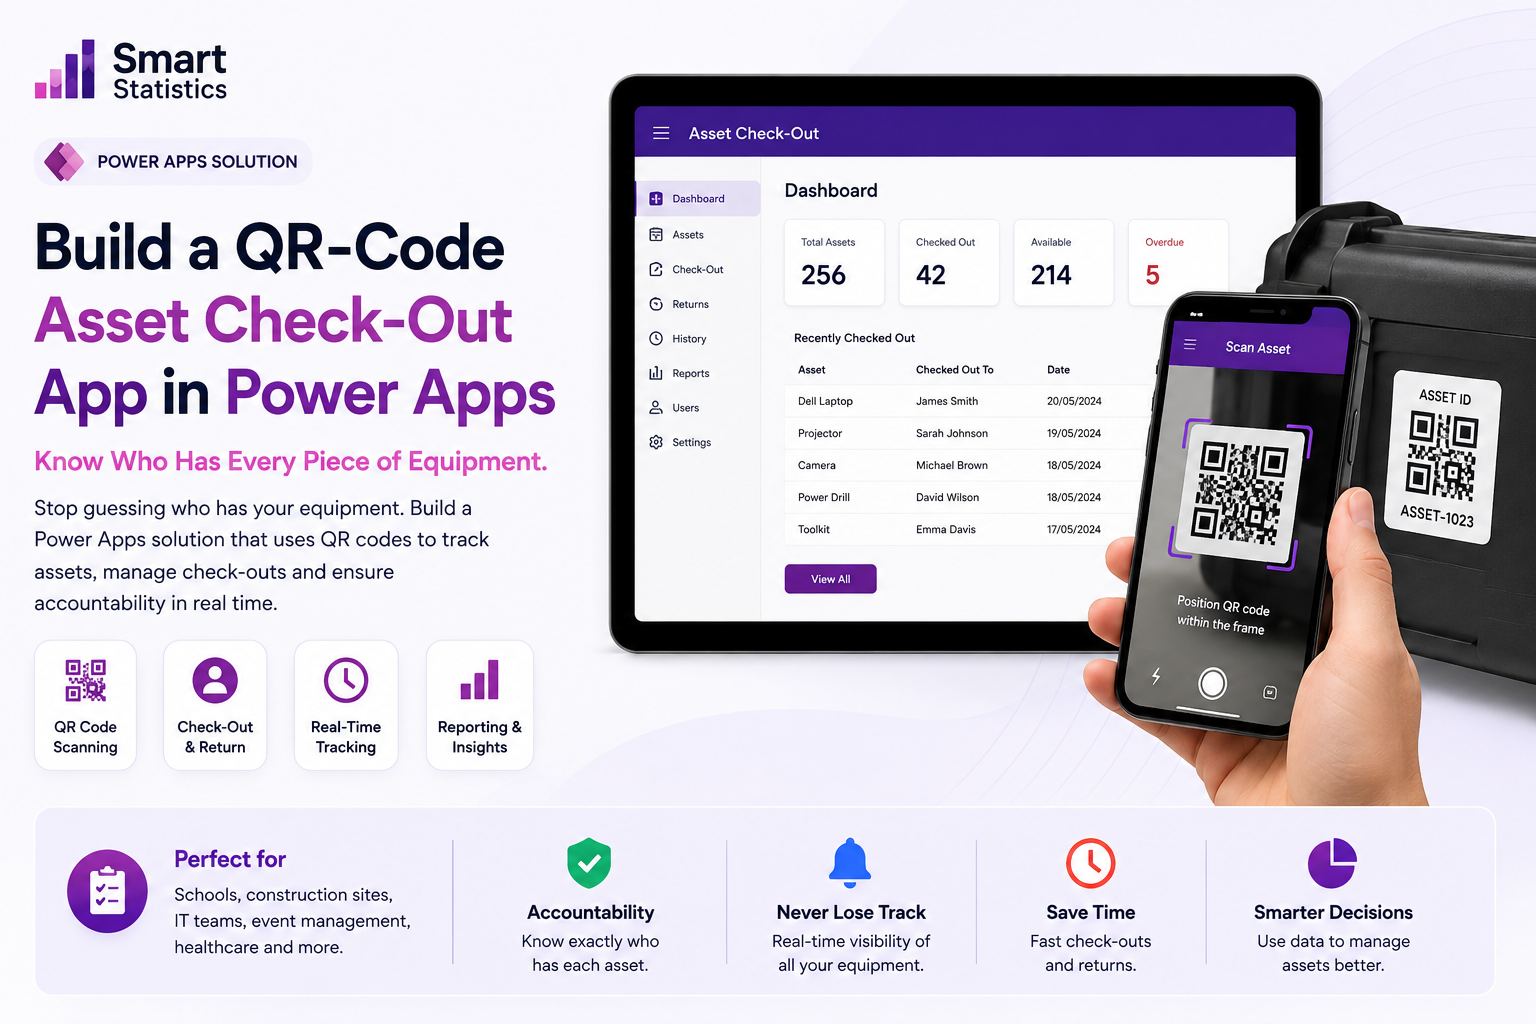
A simple Power Apps solution can replace paper registers and uncontrolled spreadsheets with a mobile process: scan the asset, select the employee, confirm the handover and automatically record the movement in SharePoint.
Replace the Spreadsheet Register with a Transaction Process
The important change is not the QR code itself. The value comes from turning every equipment handover into a structured transaction.
Fast Identification
Staff scan the code attached to the physical item instead of searching through a long asset register.
- QR code
- Barcode
- Manual code fallback
Clear Accountability
The current holder is visible directly against the asset instead of being inferred from an old email.
- Current holder
- Location
- Issue date
Full Movement History
Every issue, return and transfer can be stored as a separate transaction for later audit.
- Check-out history
- Returns
- Transfers
Reporting Ready
Structured SharePoint data can later feed Power BI for asset utilisation and exception reporting.
- Assets currently issued
- Movement volume
- Long-outstanding assets
Use Two Lists: Current State + History
The Assets list stores the current position of every item. The Asset Movements list records every transaction.
| List | Field | Recommended Type / Purpose |
|---|---|---|
| Assets | AssetID | Single line text. Unique identifier printed inside the QR code, for example LT-0248. |
| Assets | AssetName | Single line text, for example Dell Latitude 5450. |
| Assets | Category | Choice: Laptop, Tablet, Scanner, Tool, Phone or another business category. |
| Assets | Status | Choice: Available, Checked Out, Maintenance, Retired. |
| Assets | CurrentHolder | Person column storing the employee who currently holds the asset. |
| Assets | CurrentLocation | Single line text or Choice depending on how locations are maintained. |
| Assets | LastMovementDate | Date and Time. |
| Asset Movements | AssetID | Single line text. Keeping the key directly in the history table simplifies reporting. |
| Asset Movements | MovementType | Choice: Check Out, Return, Transfer. |
| Asset Movements | Employee | Person column. |
| Asset Movements | MovementDate | Date and Time. |
| Asset Movements | Condition | Choice: Good, Damaged, Needs Review. |
| Asset Movements | ProcessedBy | Person column storing the user who completed the handover transaction. |
Keep the Mobile Process Extremely Simple
1. Scan
Scan the QR code attached to the equipment.
2. Verify
Show the asset name, status and current holder.
3. Assign
Select the employee and location.
4. Confirm
Update the asset and create the movement record.
5. Complete
Display confirmation and return to scanning.
Build the App from Start to Finish
Create the SharePoint lists
Create the two lists described above: Assets and Asset Movements.
Add several test assets before building the app.
Example:
AssetID: LT-0248
AssetName: Dell Latitude 5450
Category: Laptop
Status: Available
CurrentHolder: blank
CurrentLocation: Leicester Office
Create a phone canvas app
Create a new blank phone canvas app and connect:
- Assets
- Asset Movements
- Microsoft 365 Users if you want richer employee search
Build the following screens:
- scrHome
- scrScanAsset
- scrAssetDetails
- scrCheckOut
- scrReturn
- scrHistory
Add the Barcode reader control
Insert the Power Apps Barcode reader control on scrScanAsset.
Rename it:
brAsset
The Barcodes output contains the codes detected during the scan. To read the first result:
First(brAsset.Barcodes).Value
Find the scanned asset
Set the Barcode reader control's OnScan property to:
Set(
    varScannedAssetID,
    First(brAsset.Barcodes).Value
);

Set(
    varAsset,
    LookUp(
        Assets,
        AssetID = varScannedAssetID
    )
);

If(
    IsBlank(varAsset),
    Notify(
        "Asset not found.",
        NotificationType.Error
    ),
    Navigate(
        scrAssetDetails,
        ScreenTransition.Fade
    )
)
The first variable stores the QR-code value. The second retrieves the matching SharePoint asset.
Add a manual-code fallback
Add a Text input called:
txtAssetID
Add a button with:
Set(
    varScannedAssetID,
    Trim(txtAssetID.Value)
);

Set(
    varAsset,
    LookUp(
        Assets,
        AssetID = varScannedAssetID
    )
);

If(
    IsBlank(varAsset),
    Notify(
        "Asset not found.",
        NotificationType.Error
    ),
    Navigate(
        scrAssetDetails,
        ScreenTransition.Fade
    )
)
Display the asset details
On scrAssetDetails, show:
- varAsset.AssetID
- varAsset.AssetName
- varAsset.Category.Value
- varAsset.Status.Value
- varAsset.CurrentLocation
If CurrentHolder is populated, display the user's DisplayName.
If(
    IsBlank(varAsset.CurrentHolder),
    "Not currently assigned",
    varAsset.CurrentHolder.DisplayName
)
Control which action is available
The Check Out button should only be active when the asset is available.
If(
    varAsset.Status.Value = "Available",
    DisplayMode.Edit,
    DisplayMode.Disabled
)
The Return button can use the opposite rule:
If(
    varAsset.Status.Value = "Checked Out",
    DisplayMode.Edit,
    DisplayMode.Disabled
)
Build the employee selection
Add a people Combo box called cmbEmployee.
You can populate it from your chosen employee source, for example Microsoft 365 Users or an Employees SharePoint list.
Keep the selection single-user so that one clear holder is assigned to each asset.
Update the asset during check-out
Use Patch to update the current asset state.
Patch(
    Assets,
    varAsset,
    {
        Status: {
            Value: "Checked Out"
        },
        CurrentHolder: {
            '@odata.type':
                "#Microsoft.Azure.Connectors.SharePoint.SPListExpandedUser",
            Claims:
                "i:0#.f|membership|" &
                Lower(cmbEmployee.Selected.Mail),
            DisplayName:
                cmbEmployee.Selected.DisplayName,
            Email:
                cmbEmployee.Selected.Mail,
            Department: "",
            JobTitle: "",
            Picture: ""
        },
        CurrentLocation:
            txtLocation.Value,
        LastMovementDate:
            Now()
    }
);
Write the movement history
Immediately after updating the asset, create a new history record.
Patch(
    'Asset Movements',
    Defaults('Asset Movements'),
    {
        Title:
            varAsset.AssetID &
            " - Check Out",
        AssetID:
            varAsset.AssetID,
        MovementType: {
            Value: "Check Out"
        },
        Employee: {
            '@odata.type':
                "#Microsoft.Azure.Connectors.SharePoint.SPListExpandedUser",
            Claims:
                "i:0#.f|membership|" &
                Lower(cmbEmployee.Selected.Mail),
            DisplayName:
                cmbEmployee.Selected.DisplayName,
            Email:
                cmbEmployee.Selected.Mail,
            Department: "",
            JobTitle: "",
            Picture: ""
        },
        MovementDate:
            Now(),
        Location:
            txtLocation.Value,
        Condition: {
            Value: ddCondition.Selected.Value
        },
        Notes:
            txtNotes.Value
    }
);
The movement table now retains the transaction even after the asset is later returned.
Add success confirmation
After both operations complete:
Notify(
    "Asset checked out successfully.",
    NotificationType.Success
);

Refresh(Assets);
Refresh('Asset Movements');

Navigate(
    scrHome,
    ScreenTransition.Fade
);
Build the return process
Returning the asset reverses the current-state values.
Patch(
    Assets,
    varAsset,
    {
        Status: {
            Value: "Available"
        },
        CurrentHolder:
            Blank(),
        CurrentLocation:
            txtReturnLocation.Value,
        LastMovementDate:
            Now()
    }
);
Then create another Asset Movements record with MovementType set to Return.
Add the asset history gallery
On scrHistory, insert a vertical Gallery and set its Items property to:
SortByColumns(
    Filter(
        'Asset Movements',
        AssetID = varAsset.AssetID
    ),
    "MovementDate",
    SortOrder.Descending
)
Display:
- MovementType.Value
- Employee.DisplayName
- MovementDate
- Location
- Condition.Value
- Notes
Add useful validation
Do not allow a check-out if no employee has been selected.
If(
    IsBlank(cmbEmployee.Selected.Mail),
    Notify(
        "Select an employee before continuing.",
        NotificationType.Warning
    ),
    /* Run check-out logic here */
)
Also validate:
- Asset status
- Location
- Required condition field
- Duplicate submission
Create QR labels
Each physical asset needs a QR label containing exactly the same value stored in AssetID.
For example:
LT-0248
Keep the encoded value short and stable. Do not encode volatile information such as the employee name or current status.
Test the mobile experience
Test the finished app on the devices employees will actually use.
Confirm:
- The QR code scans reliably
- The correct asset appears
- Unavailable assets cannot be checked out
- Person fields save correctly
- The movement record is created
- Returns clear the current holder
- History sorts correctly
Keep the Asset Register Reliable
The app becomes operationally valuable only when users trust the asset status and history.
Named Asset Owner
Assign responsibility for maintaining the master asset records and retiring old equipment.
Controlled Editing
Most users should transact through the app rather than directly editing SharePoint records.
Complete History
Do not delete ordinary movement records simply because an asset has changed hands again.
Review Exceptions
Use Power BI later to surface assets checked out unusually long or equipment repeatedly marked damaged.
Power Apps Asset Tracking FAQs
Can Power Apps scan QR codes?
Will the scanner work in a desktop browser?
Can SharePoint handle this type of application?
Why use a separate Asset Movements list?
Can the app track damaged equipment?
Can we add photographs?
Can Power BI report on the asset data?
How can Smart Statistics help?
Test Scanning on the Target Devices
Microsoft documents the Power Apps Barcode reader as supporting QR codes and other barcode types on Android, iOS and Windows devices. The scanning control is not supported in the normal desktop browser experience, so mobile testing should be part of deployment.
Microsoft also recommends providing a visible scan result and an alternative manual input method for accessibility.
Still Tracking Equipment in Spreadsheets, Emails or Paper Registers?
Smart Statistics helps UK businesses replace manual operational processes with practical Microsoft 365 applications built around Power Apps, SharePoint, Power Automate and Power BI.
We can help design the data structure, build the app, automate notifications and turn the resulting data into management reporting.